

Before you install
Confirm that the device supports eSIM and is carrier unlocked. Connect to reliable Wi-Fi, update the operating system, and save the QR code on another device or print it. A phone cannot use its camera to scan a QR code displayed on that same phone.
Keep the SM-DP+ address and activation code too, if your provider supplied them, so you can install manually. Do not remove an installed eSIM unless your provider confirms that it can be installed again: many QR codes work only once.
- Keep your primary SIM for calls and SMS if needed.
- Check the activation policy. Some plans start when installed; others start when they first connect in the destination.
- Keep data roaming turned off for your primary SIM to avoid roaming charges.
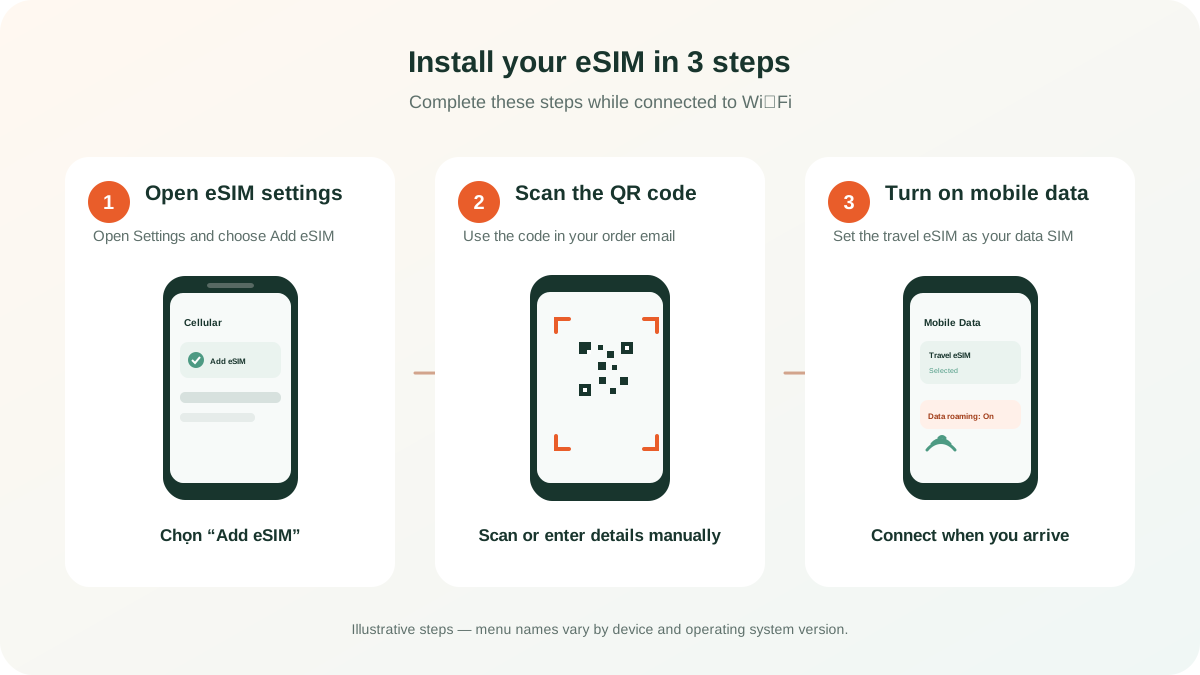
Install an eSIM on iPhone (iOS)
- Go to Settings › Cellular (or Mobile Data) › Add eSIM.
- Choose Use QR Code, then scan the code your provider sent. If you do not have a QR code, choose Enter Details Manually and enter the supplied details.
- Select Add Cellular Plan and give the line a clear label, such as “Travel eSIM.”
- When asked to choose defaults, keep your primary line for calls and SMS; select the travel eSIM for Cellular Data once you arrive.
After arrival, go to Settings › Cellular › Travel eSIM, turn on Turn On This Line and enable Data Roaming if the plan instructions require it. Under Cellular Data, choose the travel eSIM and turn off Allow Cellular Data Switching so your iPhone does not fall back to the primary SIM.
Install an eSIM on Android
Menu names differ by manufacturer and Android version, but the usual process is to open SIM management, add an eSIM, and scan the QR code.
- Go to Settings › Network & internet › SIMs or Settings › Connections › SIM manager.
- Select Add SIM, Add eSIM, or the + button. On many Samsung phones, use Add eSIM.
- Choose to scan a QR code, connect to Wi-Fi if prompted, then scan the code or enter the details manually.
- Name the eSIM, turn it on, and select it for Mobile data when you reach your destination.
On Google Pixel, the usual path is Settings › Network & internet › SIMs › Add SIM › Set up an eSIM. Then open the new eSIM under SIMs and enable Mobile data and Roaming when required. On Samsung, use SIM manager to confirm that the travel eSIM is selected for Mobile data.
Install on iPad, tablets, and other devices
Some iPads, Android tablets, laptops, and wearables have eSIM support, but not every eSIM-capable device can use an independent travel eSIM. The device must allow profiles from other providers and support mobile data in your destination.
- Cellular iPad: go to Settings › Cellular Data › Add a New Plan, then scan the QR code or enter the supplied details. Wi-Fi-only iPad models do not support eSIM.
- Android tablet: go to Settings › Network/Connections › SIMs or Mobile network › Add eSIM. The exact path differs by manufacturer.
- eSIM laptop: open Cellular or Mobile network settings in the operating system, then add a profile or data plan and scan the QR code if supported. Check the manufacturer’s instructions first.
- Smartwatch: eSIMs on Apple Watch, Galaxy Watch, and many other watches are usually tied to the primary carrier plan and cannot install an independent travel eSIM. Confirm compatibility with the provider before buying a plan for a watch.
If there is no option to add an eSIM, check the exact device variant, carrier-lock status, and operating-system updates. See our guide to checking eSIM compatibility.
Connect and check your eSIM
At your destination, turn off airplane mode, enable the travel eSIM, and set it as the mobile-data line. If required, turn on data roaming on the travel eSIM. This is how many travel plans connect to partner networks; it does not mean enabling roaming on your primary SIM.
Open a browser to test the connection. If there is no service, wait a few minutes, restart the device, check coverage, and review the plan’s APN instructions. Do not change the APN unless the provider instructs you to.
Common problems
- The QR code will not scan: show it on another device, increase that screen’s brightness, or enter the details manually.
- The eSIM cannot be added: confirm the device is unlocked, has room for another eSIM profile, and that the QR code has not been used already.
- There is signal but no internet: select the correct eSIM for mobile data, enable roaming on that eSIM, and check the APN. Step-by-step: enable data roaming.
- Your primary SIM is charged: turn off mobile data and data roaming for the primary SIM, and disable automatic data switching.
- You still cannot connect: send support a screenshot of SIM management, the plan name, and the displayed error. Do not share your QR or activation code publicly.